You will need the following...
1. Click the Mail menu up the top and select Preferences from the list, as shown below.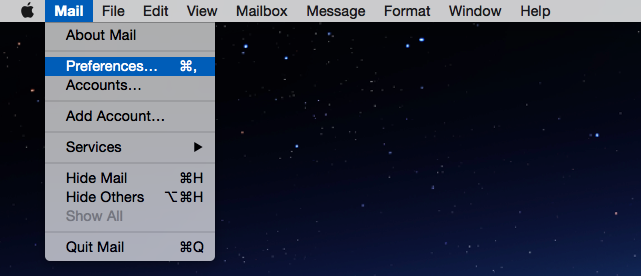
2. By default you should be looking at the Accounts tab as per the picture below. Select your account from the list on the left, you may have more than one.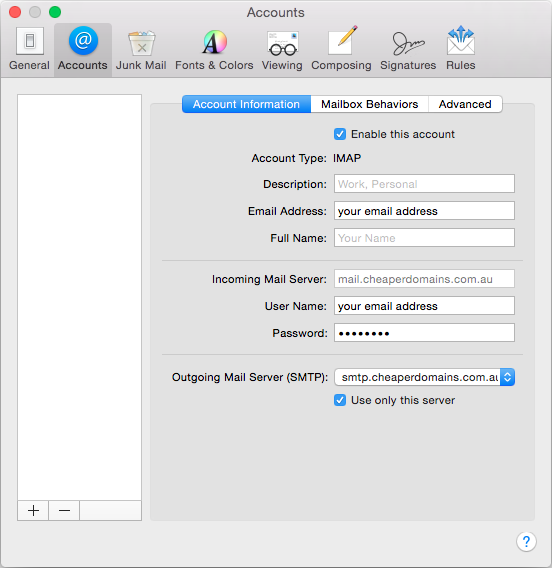
3. Check the following settings on the page
4. Click on the Advanced tab to the right. The screenshot below is what you will see if you are using IMAP as the account type.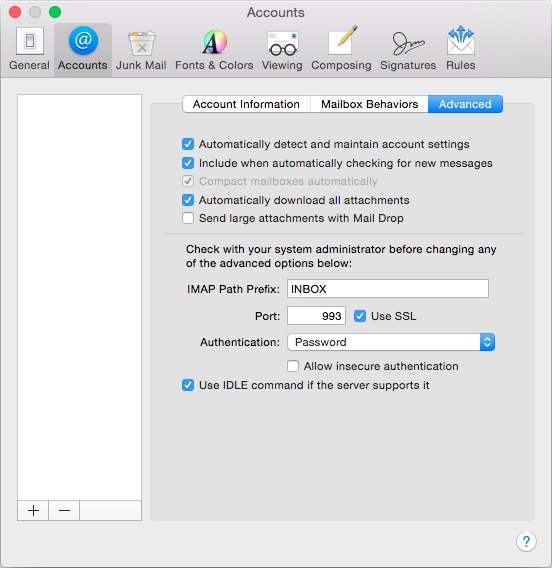
Things To Note...
Imap Path Prefix: Inbox (with a capital I) makes the special folders display and sync correctly when using IMAP. If using POP this is not applicable
Port: 993 (IMAP) or 995 (POP) as account type
Authentication: Password. Do not use any other authentication method or your account won't work
Use IDLE command if server supports it. Leave ticked. Not applicable for POP account types
Make sure the first two tick boxes at the top of the page are ticked. If not then mac mail will not check the account even if your settings are perfect
5. Click back to the Account Information tab.
6. Under Outgoing Mail Server (SMTP), click on the Server Name and you will see context menu appear.
7. Select Edit Server List. Select the outgoing mail server. Check the server name is smtp.cheaperdomains.com.au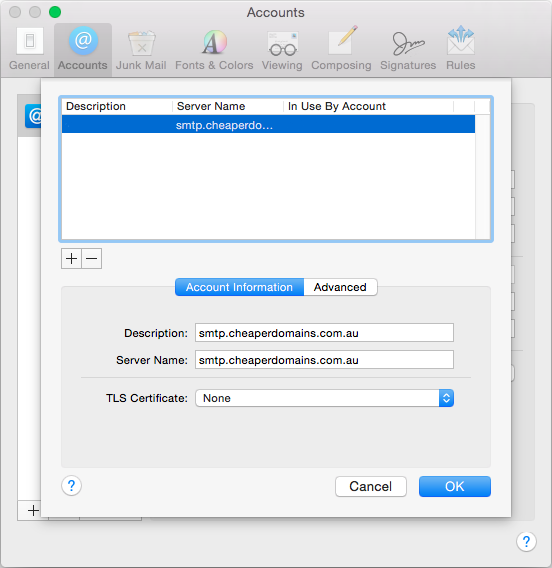
8. Click the Advanced tab to the right and check the following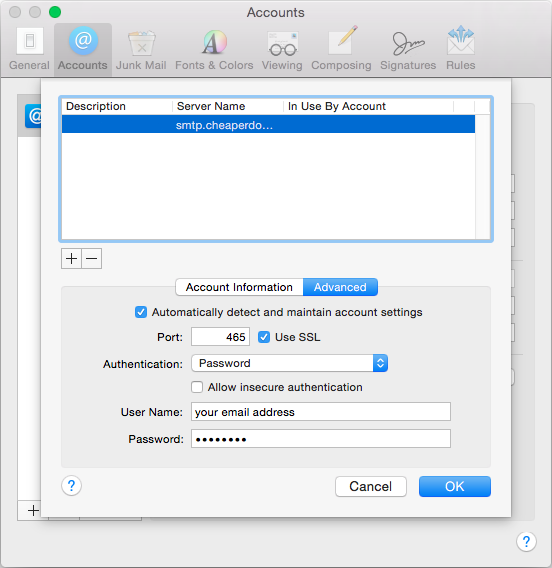
Note: If you can't find an answer to your problem click Here to open a support ticket (requires log in).


