Do you want to move your blog from WordPress.com to CheaperDomains?
This is how you do it.
Many beginners often start with WordPress.com, but they soon realize its limitations and want to switch to the self-hosted CheaperDomains platform.
Step 1 - Exporting Data from WordPress.com
First, you need to sign in to your WordPress.com site and go to your account dashboard. From the left column, you need to click on the Tools > Export menu and then click on the ‘Export All’ button.
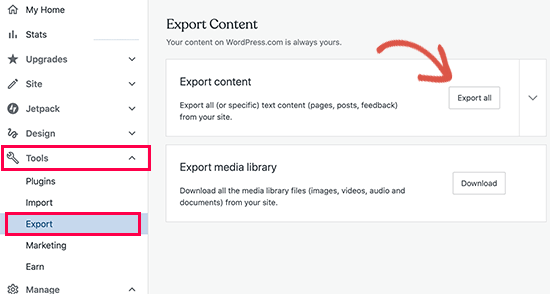
This allows you to export your WordPress site. Once the export file is ready, a download link will be visible. You can click to download the zip file on your computer.
WordPress.com will also email the link to your email address.
If you need to export your media library you can do that here as well, just under the export content.
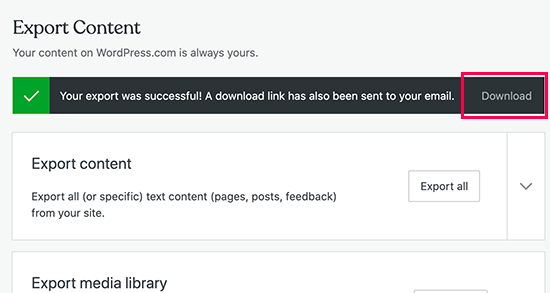
Once you have downloaded the file to your computer, you need to unzip it. Inside it, you’ll find an XML file that has all of your posts, pages, images, comments, custom fields, categories, tags, navigation menus, and other data.
Step 2 - Setting up WordPress
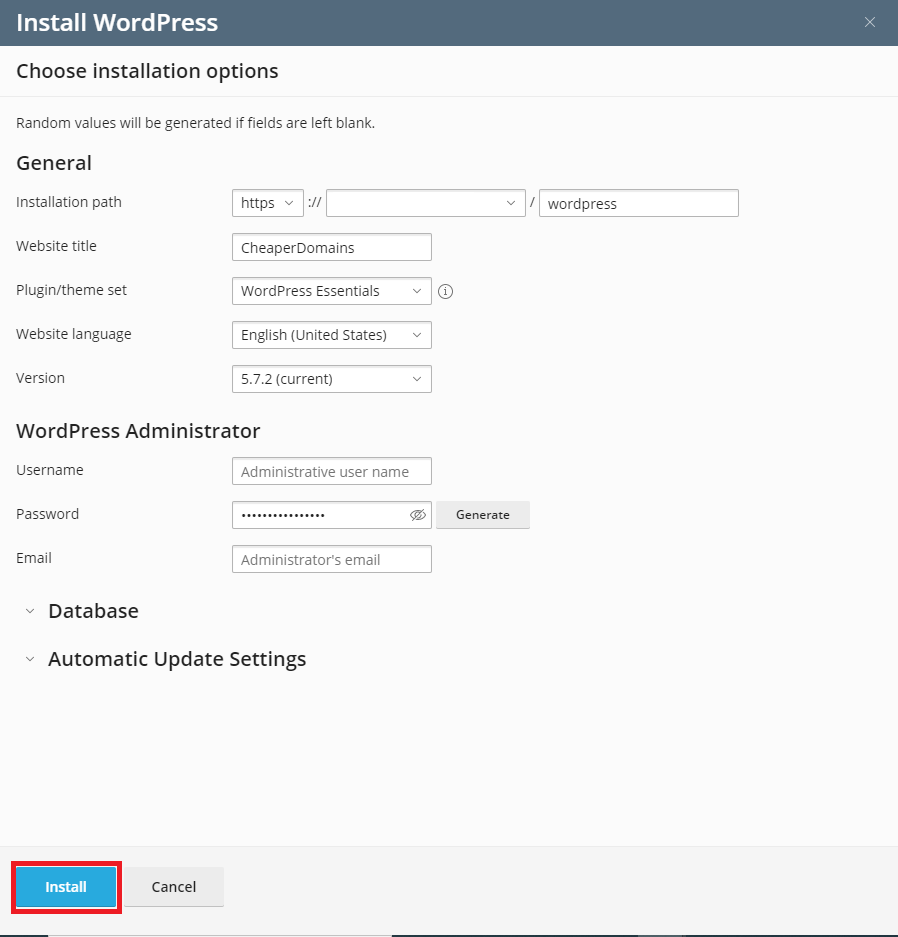
Now that you have exported your WordPress.com data, the next step is to set up a fresh WordPress install on your Plesk control panel.
Just open your Plesk control and on the left, there will be a WordPress option.
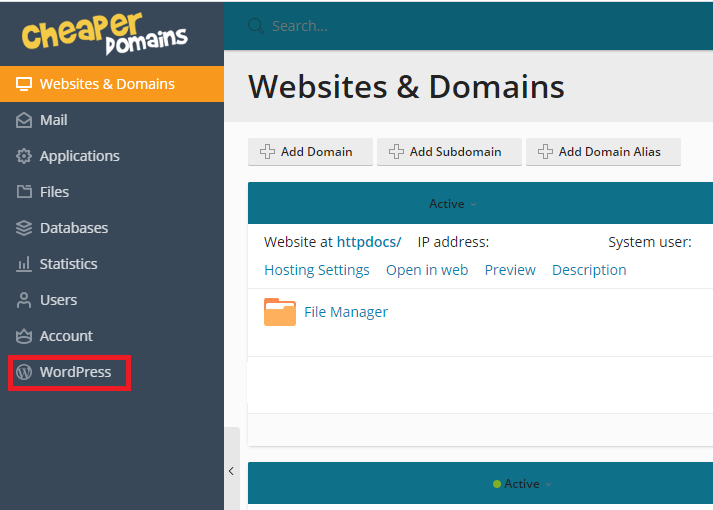
Click that then hit install.
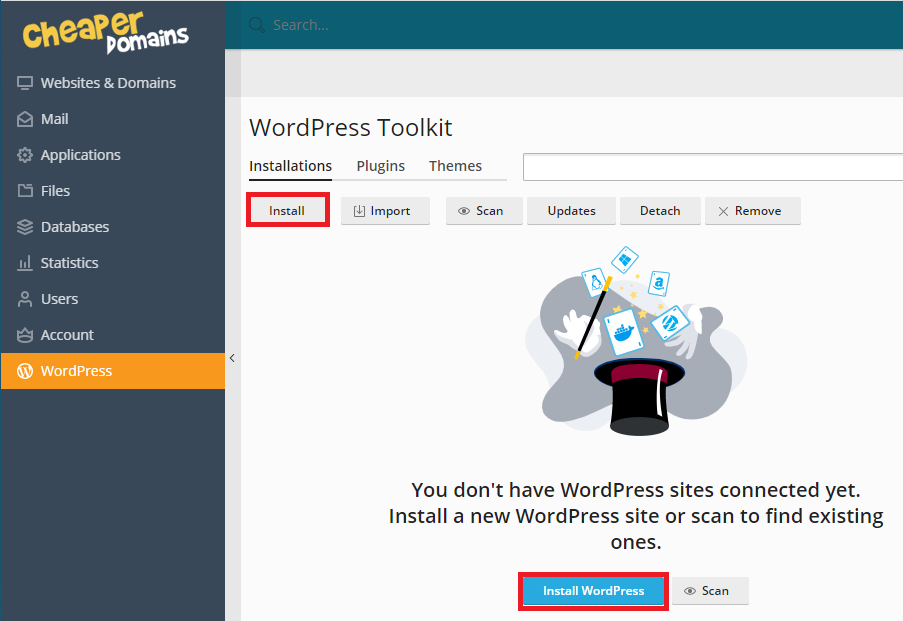
Step 3 - Importing Content into Self Hosted WordPress Site
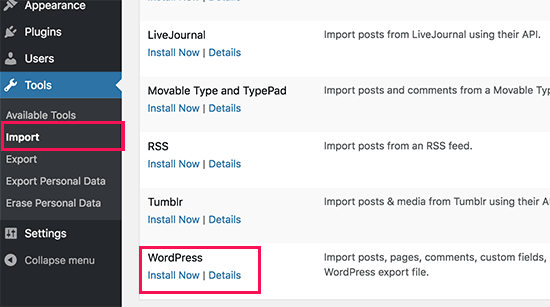
In order to import your old WordPress.com site content to your new CheaperDomains hosting, you will need to login to your freshly installed WordPress website’s admin area. From here you need to visit the Tools > Import page and click on the ‘Install Now’ button below WordPress.
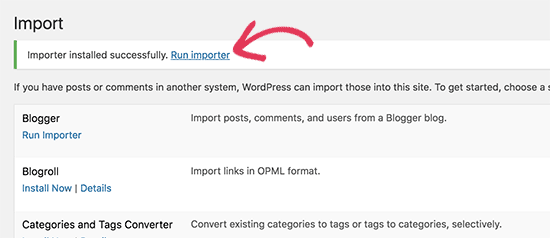
WordPress will now install the WordPress importer for you. Once it’s done, you need to click on the ‘Run importer’ link to continue.
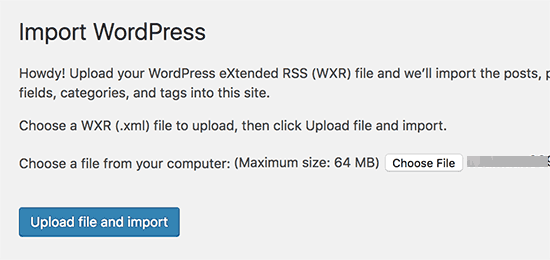
It will take you to a screen where you will be asked to upload your WordPress.com XML file that you downloaded in step 1 of this tutorial.
Note: If you can't find an answer to your problem click Here to open a support ticket (requires log in).


